Manage Vendors
A vendor can register on the merchant landing page on the front end but Sometime you may want to add a vendor from the back office and you can do that!
To create a new vendor, you just have to provide some basic information and the system will send an email with instructions to the vendor to complete the registration process. Of course, you have full control to manage vendors from your admin panel.
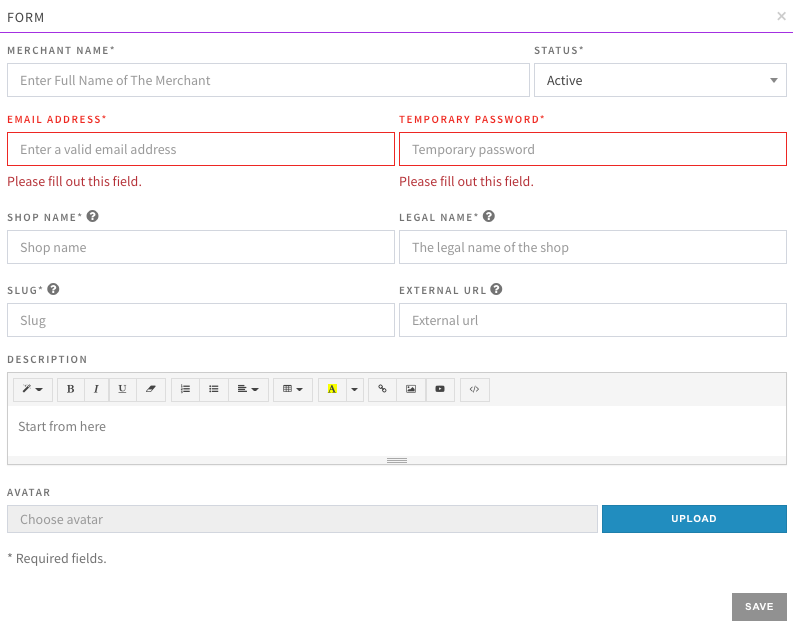
Click on Vendors, select Merchant - and click on add new vendor. 
Fill all the necessary information on the form provided and click on save.
Vendor Approval System
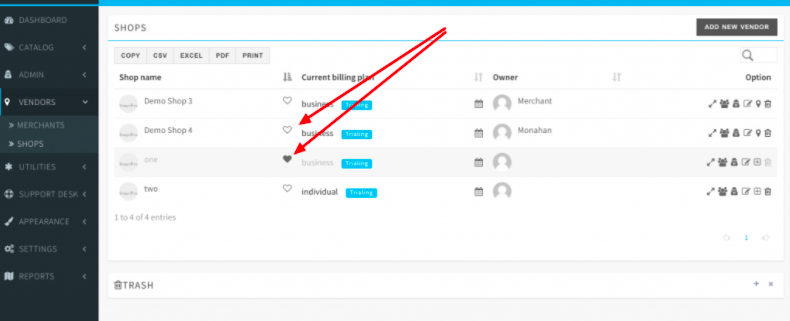
To activate, click on Vendors, Select shop, and find the vendor that needs to be activated. The
activate or deactivate the vendor. Also you can use the 
Vendor Verification System
This is one of the most requested features from the customers. This feature will help prevent fraud and gain trust from buyers. A shiny verified badge ![]() will be displayed on the side of vendor name on the marketplace, so the customers will know which vendors are verified.
will be displayed on the side of vendor name on the marketplace, so the customers will know which vendors are verified.
Vendors can upload the required documents from their profile page and admin will see the request on the dashboard.
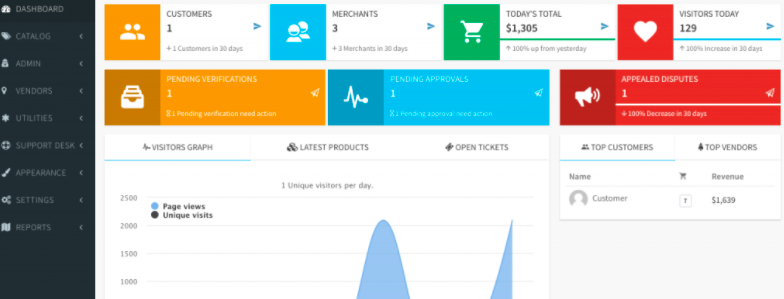
When a vendor uploads documents to verify you’ll see the PENDING VERIFICATIONS box with the number of requests.
Click over the ![]() symbol will get you to the pending verification control panel.
symbol will get you to the pending verification control panel.
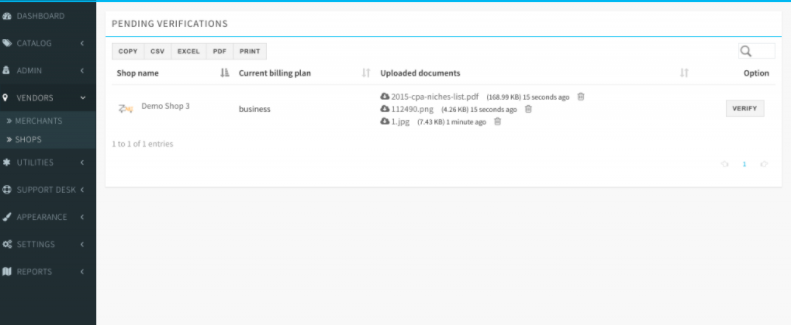
Click over the ![]() symbol to download the document and do manual inspection. If you are satisfied with the submitted documents you need to click over the
symbol to download the document and do manual inspection. If you are satisfied with the submitted documents you need to click over the VERIFY button to complete the action. You can also delete the file using the ![]() button to keep your system clean.
button to keep your system clean.
PENDING VERIFICATIONS